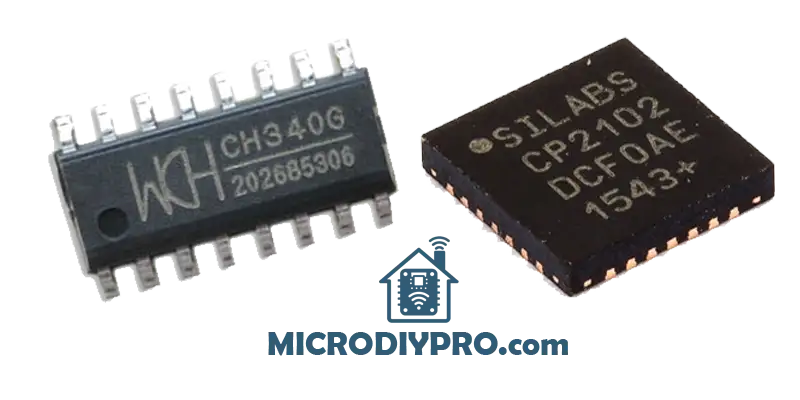
How to Install CH340G and CP2102 USB to Serial Drivers (windows)
In this post I give you CH340G and CP2102 USB to Serial Drivers to download and I will show you how you can install it manually from device manager on windows 11. This tutorial can be used for other windows like windows 7, 8, 8.1 and 10.
CH340G USB to UART chip driver for windows
Driver is for hardware with below information :
CH340G USB A to serial adapter module
USB\VID_1A86&PID_7523\6&42CA04E&0&11
USB\VID_1A86&PID_7523&REV_0254
USB\VID_1A86&PID_7523
Direct download from my website or from external link
CP2102 USB to UART chip driver for windows
Driver is for hardware with below information :
Silicon Labs CP210x USB to UART Bridge
USB\VID_10C4&PID_EA60\0001
USB\VID_10C4&PID_EA60&REV_0100
USB\VID_10C4&PID_EA60
Direct download from my website or from external link
CP2102 USB to UART chip driver installation tutorial for windows
If you're working with development boards like ESP8266, ESP32, or Arduino, and your device isn’t recognized by your PC, you may need to manually install the CP2102 USB-to-Serial driver. Here's a step-by-step guide on how to do it. This tutorial will work for CH340G too, while it maybe installed automatically when your computer is connected to internet.
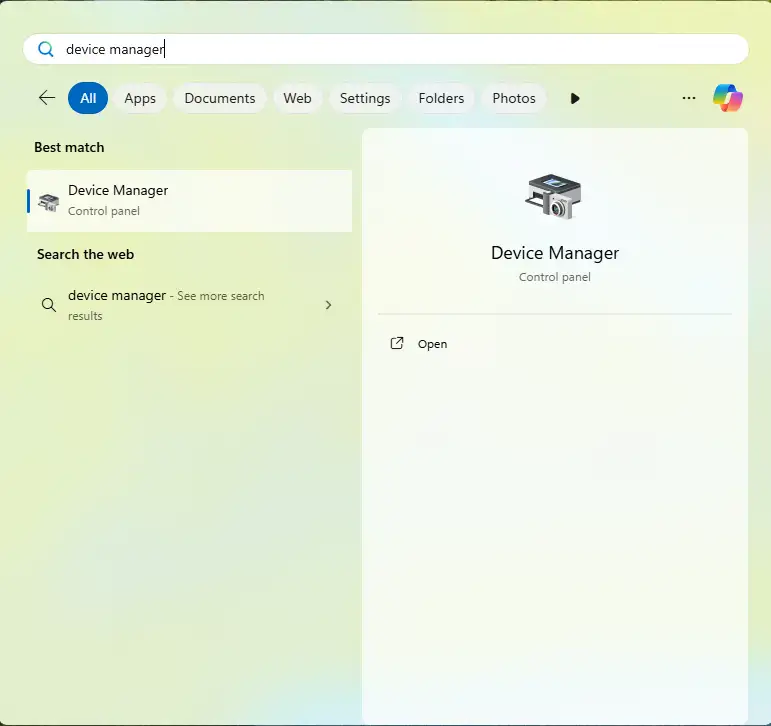
✅ Step 1: Open Device Manager
• Click the Start button and type “Device Manager”.
• Click to open the Device Manager window.
✅ Step 2: Locate the Unknown Device
• In the Device Manager, look for a device with a yellow exclamation mark under Other devices or Ports (COM & LPT).
• Right-click the Unknown device and choose “Properties”.
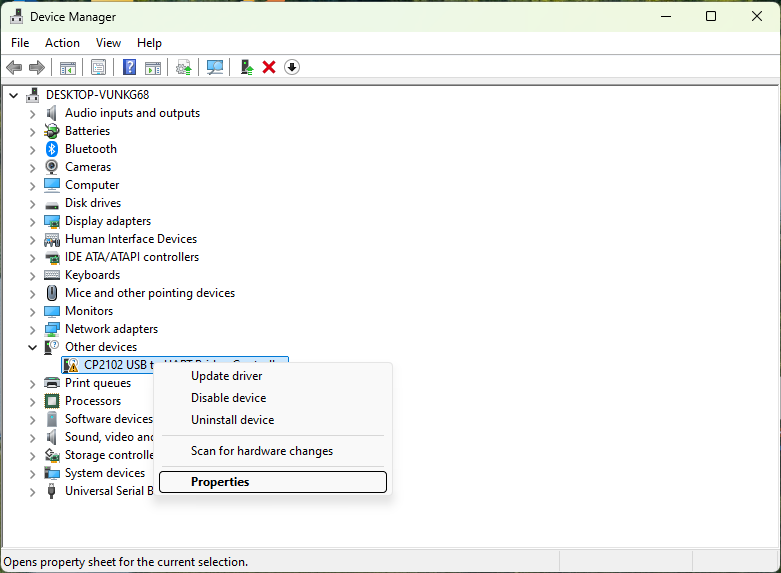
✅ Step 3: Check the Hardware ID
• In the Properties window, go to the “Details” tab.
• From the dropdown menu, select “Hardware Ids”.
• Note down the VID (Vendor ID) and PID (Product ID). For CP2102, it’s usually:
VID_10C4&PID_EA60
• This ensures you’re using the correct driver for your chip.
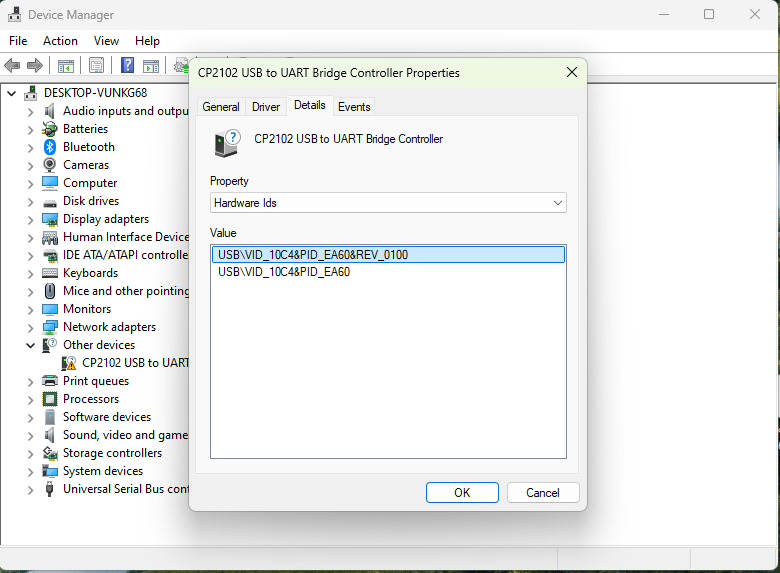
✅ Step 4: Start the Driver Installation
• Close the Properties window.
• Right-click the Unknown device again and select “Update driver”.
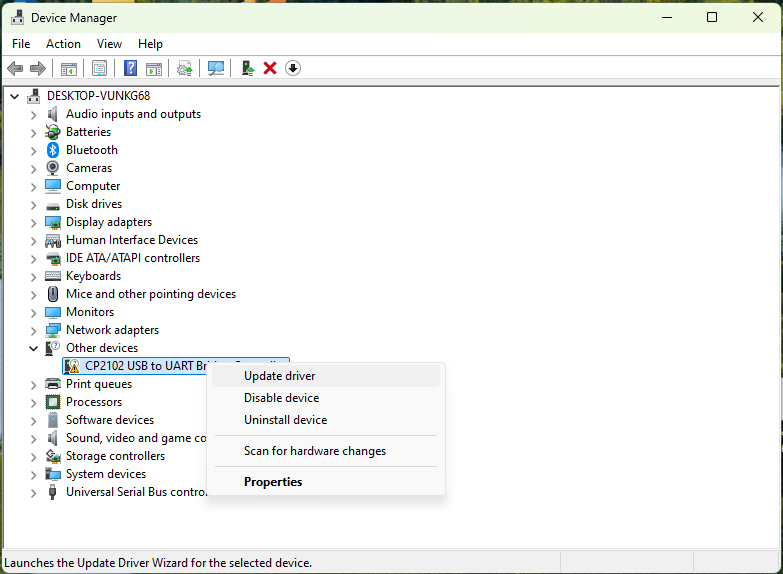
✅ Step 5: Browse for the Driver Software
• In the window that opens, click “Browse my computer for drivers”.
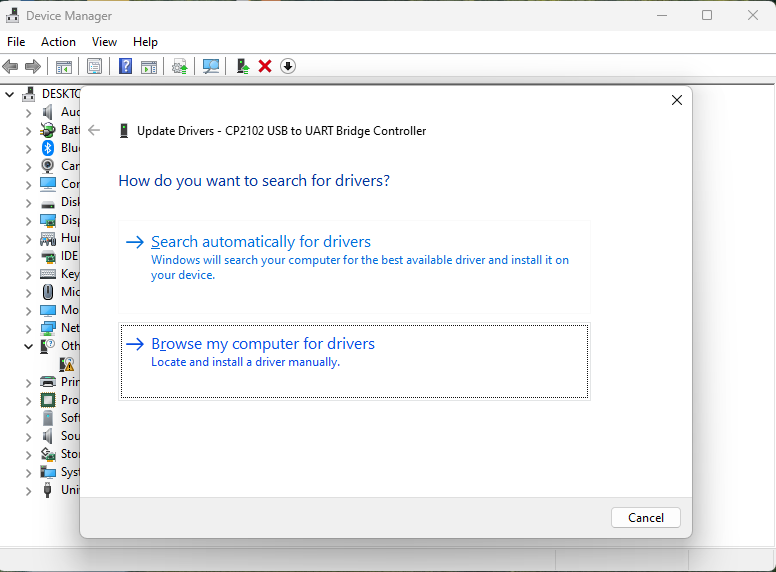
✅ Step 6: Click on “Browse” button and navigate to the driver folder and select the folder and click on “OK” button.
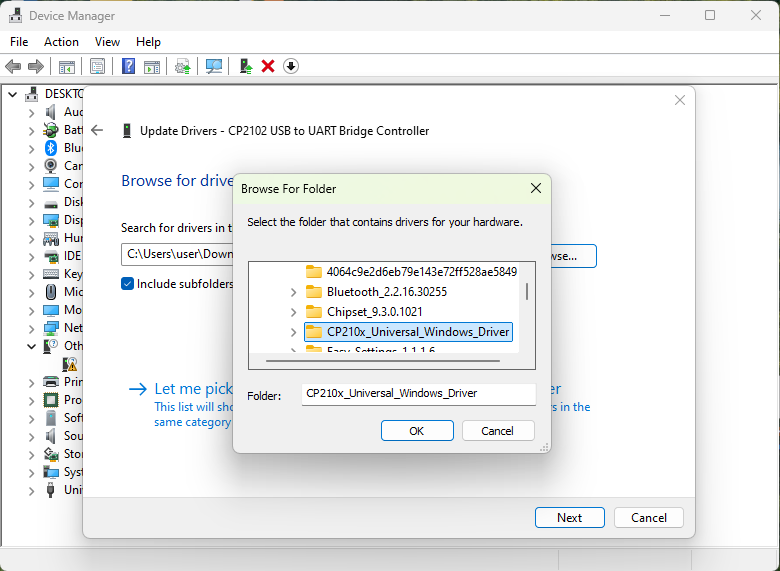
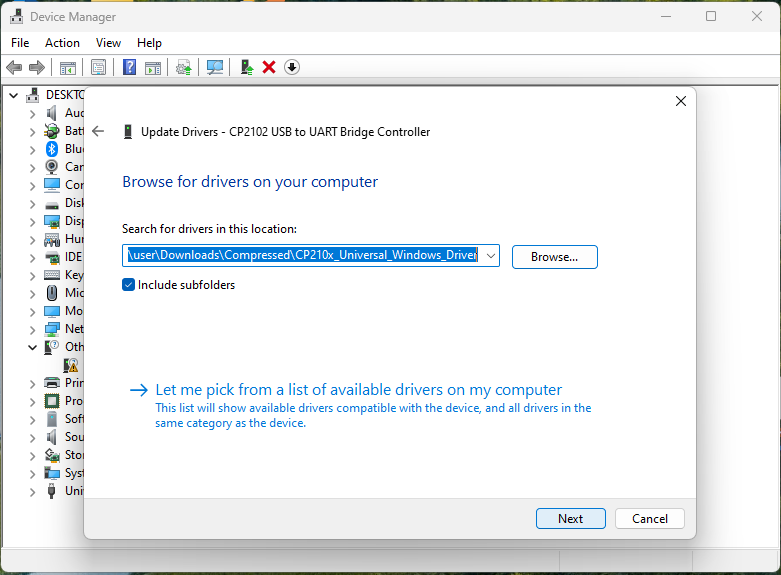
✅ Step 7: Click “Next” button.
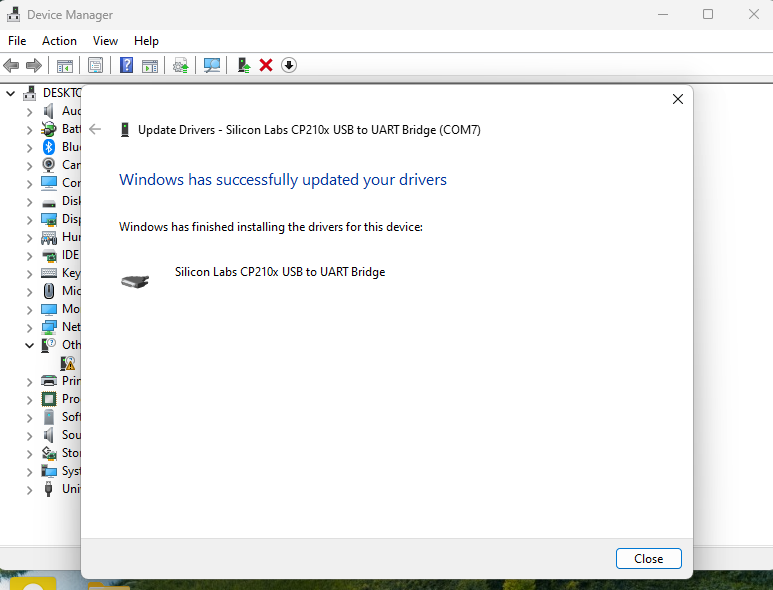
✅ Step 8: After installation you will see a window like below with “Windows has successfully updated your drivers” message.
✅ Step 9:Verify the COM Port
• Now, back in Device Manager, you should see a new device under Ports (COM & LPT) like:
Silicon Labs CP210x USB to UART Bridge (COM7)
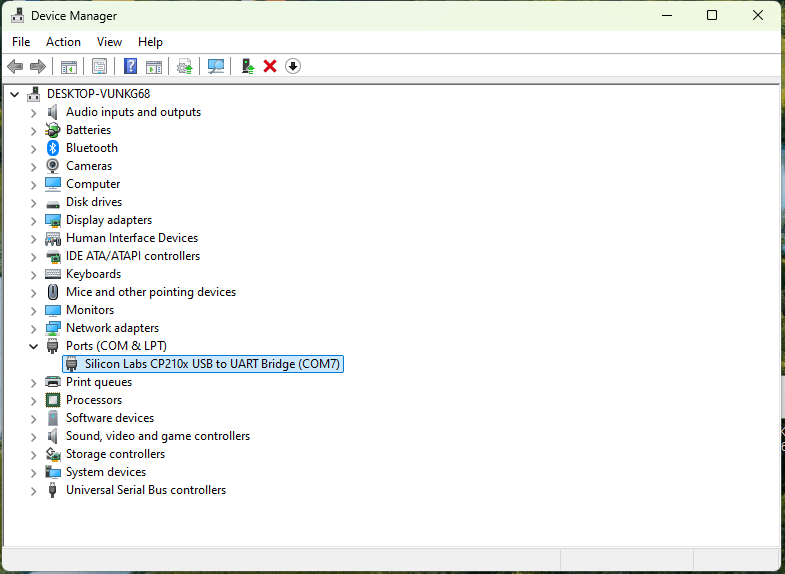
This COM port number will be used to communicate with your development board (ESP32, ESP8266, Arduino, etc.) through the serial monitor or IDE.

